Learn how to create a coloured kite shield with this photoshop tutorial
For this photoshop tutorial I thought I might teach you how to make a kite shield like the one below: Open a new document 300x300 pixels, press the D key in order to reset your colors to default colors and Using the Pen Tool draw a triangle, something similar to what you see I draw in the image below:
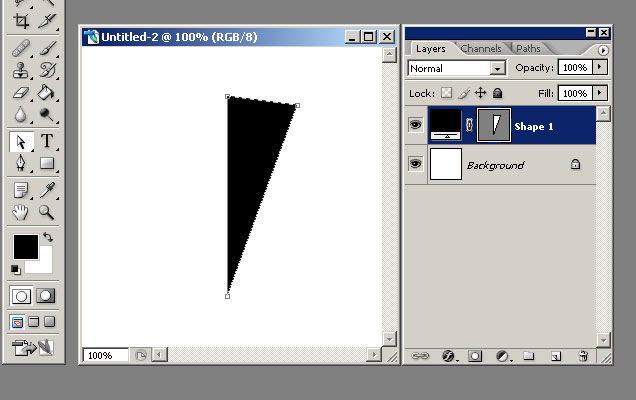 Using the Pen Tool we need to add 2 more anchor points the first should be placed somewhere in the middle of the distance between the upper and the right anchor point and the second should be placed somewhere in the middle of the distance between the lower and the right anchor points, something similar to what you see below:
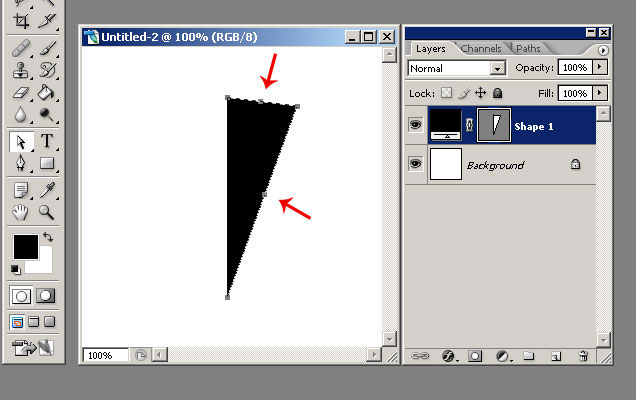 Now, using the Direct Selection Tool, you need to drag the 2 anchor points you just created, one inside the path and one outside the path, until you obtain something like this:
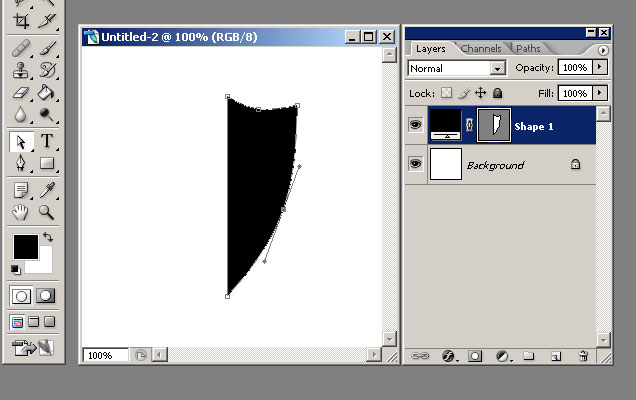 Using also the Direct Selection Tool press and hold the ALT key and when you approach the shape layer with your cursor you will see a little + appearing next to your tool. You need to click and drag your shape with the ALT key pressed (while holding the SHIFT key so that you can move in a straight line). You should obtain something like this:
 What you need now is to horizontally flip the new sub-shape you just created. For this press CTRL+T while your sub-shape is selected (if you deselect it you can reselect it by using the Path Selection Tool) and then right Click anywhere on the image and select Flip Horizontal from the options available, like you see below:
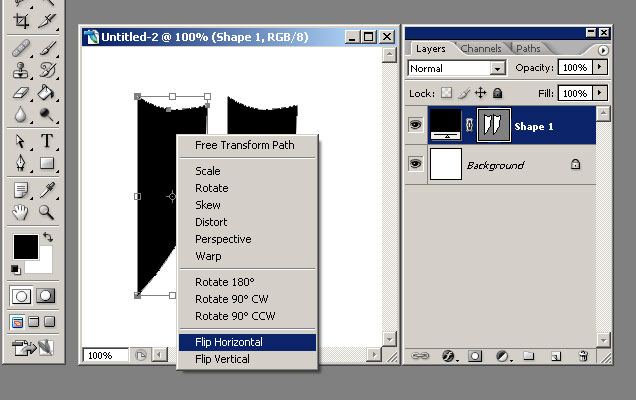 Now holding the SHIFT key simply drag the sub-shape until it joins with the other sub-shape:
 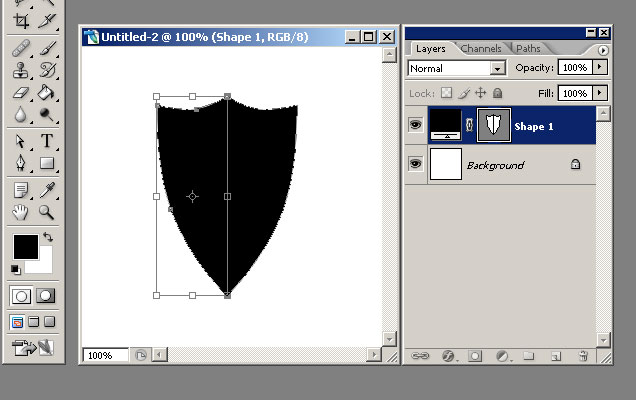 Press the ENTER key. There is you shield. Your image should look similar to this one below:
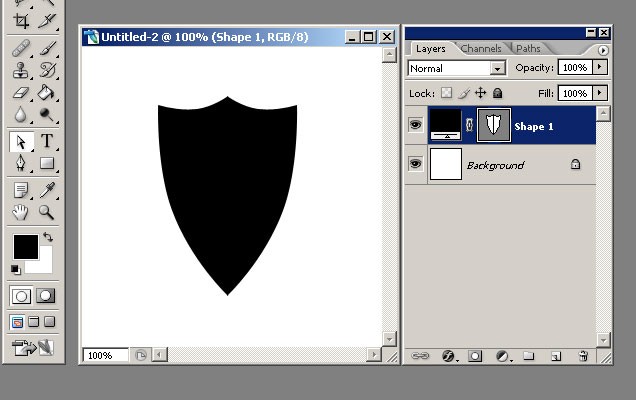 Now you need a little color on your shield so here is what you should do: set you foreground color to darken red, I used #b40000 and the background color to a brighter red, I used #ff130d.
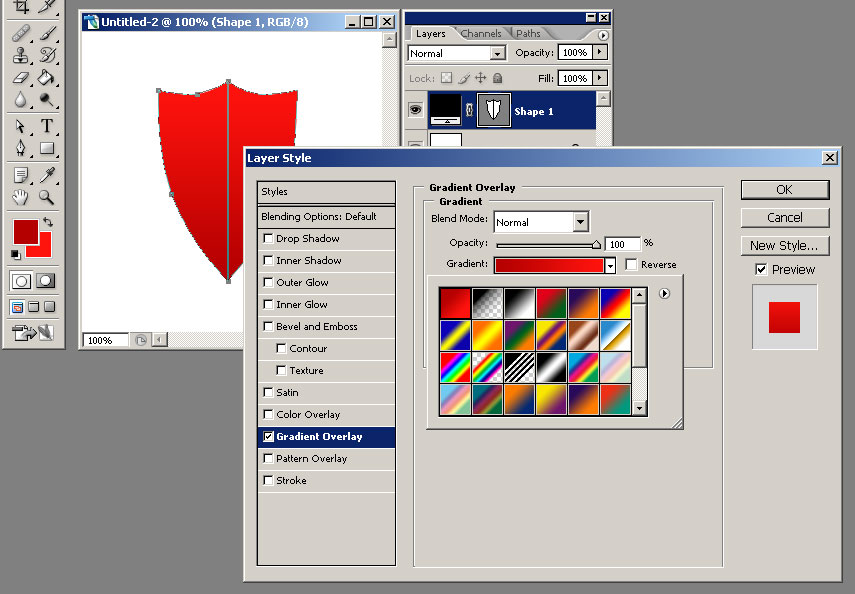
Double click the shape layer you just created in order to see the Lyer Style options and choose Gradient Overlay and from the Gradient picker choose Foreground to Background (it's the first gradient available). You should have something similar to this:
 Now CTRL+Click the shape layer in order to Load it's selection and using the Rectangular Marquee Tool with the ALT key pressed (in order to substract from the selection) substract 2 times from our selection until you obtain a selection like the one I have in the image below:
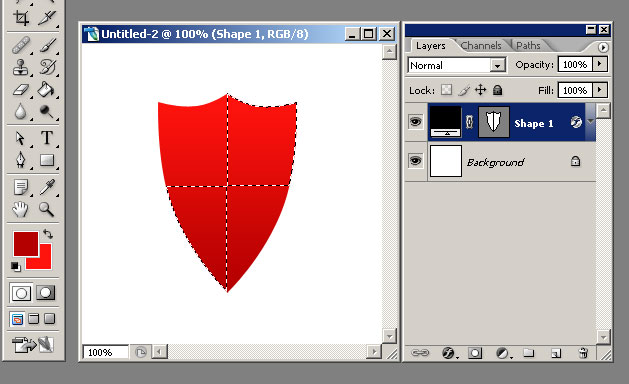 Create a new layer (mine is called Layer 1) above the shape layer (SHIFT+CTRL+N can be used) and then fill the selection with white. Your shield should look like this:
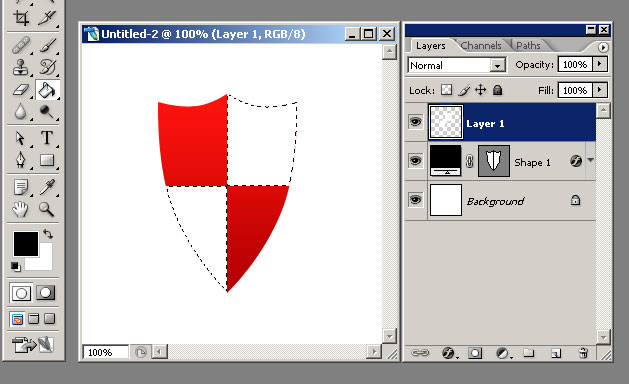 CTRL+Click the shape layer in order to Load it's selection again and create a new layer above all the layers in your image. Go to Edit menu and choose Stroke. On the dialog box that appears select the width of the Stroke to 3 pixels, set the Color to black and from Location select Inside.
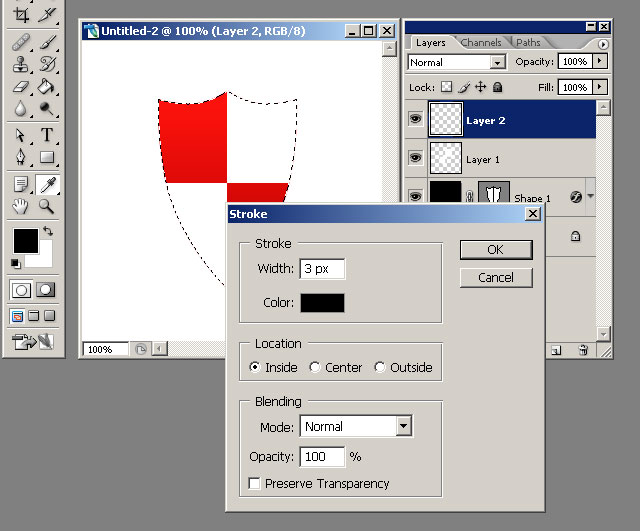 Click the OK button and with your selection still active got o Filter > Blur > Gaussian Blur and set the Radius to 10 pixels. You should have something like in the image below:
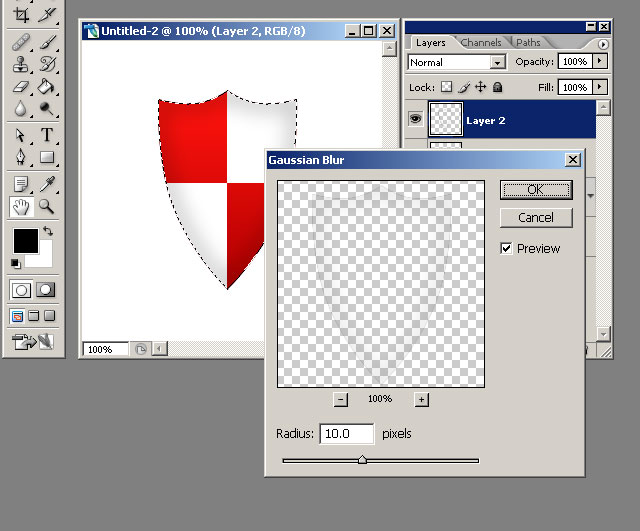 You need to add a shadow to your shield so double Click the shape layer again in order to see the Lyer Style options and choose Drop Shadow with the following values: Opacity 35%, Angle 90 degrees, Distance 5px and Size 15px, leaving the other options intact. Your shield should now look like this:
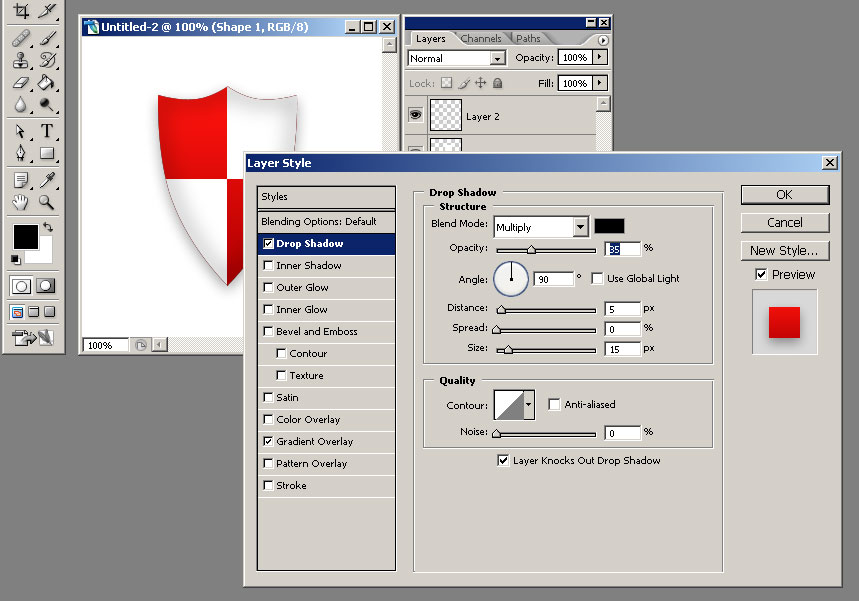 You see that the margins look really jagged and you don't want that CTRL+Click the shape layer in order to Load it's selection again and go again to Edit > Stroke. This time I want you to set the Width of the Stroke to 2 pixels, Color to #b3b3b3 and Location to Center. Click OK.
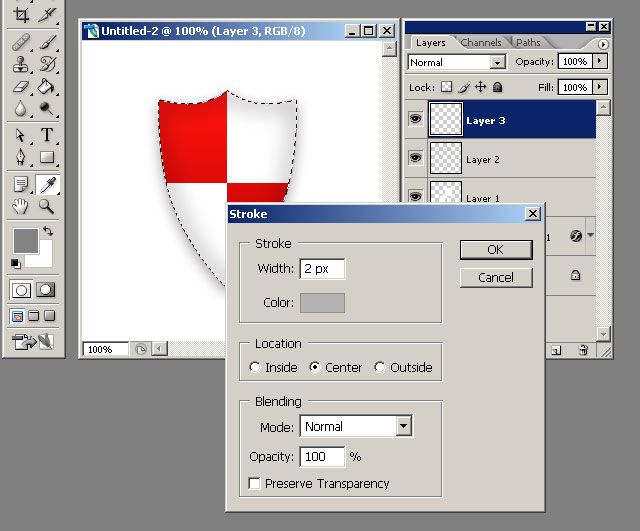 At the end of this photoshop tutorial you should have a nice shield like this one:If you want to go a little further with the effects and styles apllied to the shield you can obtain something like I have below:
 I will be back with many more, until then check out some of my other photoshop tutorials: