Learn how to make realistic autumn leaves with this photoshop tutorial
Things are moving faster then I ever thought so here is another Photoshop tutorial, in this tutorial we will learn to create very nice coloured autumn leaves, like the one you see below. First we need to obtain a leaf brush and then use it to creat those wonderful, very nice coloured leaves. STEP 1
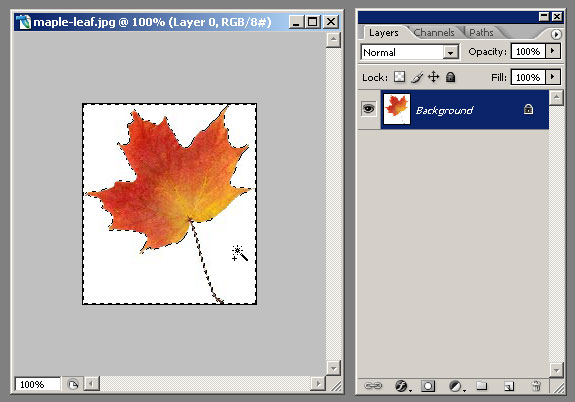
 Start by searching a leaf photo or something similar, I have a maple leaf photo.
Now, this maple leaf must be separated from it's background and then use it to define a new brush preset. First we need to take the Magic Wand Tool and select the white parts of the image.
 Then we need to double click the background layer in the Layer Palette (or go to the Layer menu and select New and then Layer From Background) in order to make it a normal layer.Then click delete key to ge rid of the white parts of the photo and keep only the leaf.
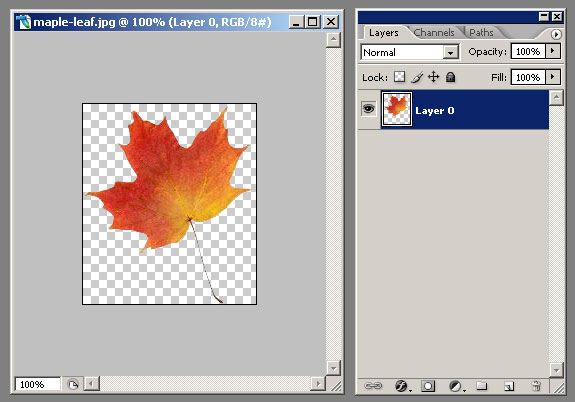 After this we need to increase the contrast a little so go to Image > Adjustments > Brightness/Contrast and set the Contrast to 25 and Brightness to -5. Now it's time to define our leaf as a Brush so go to Edit > Define Brush Preset and click OK.
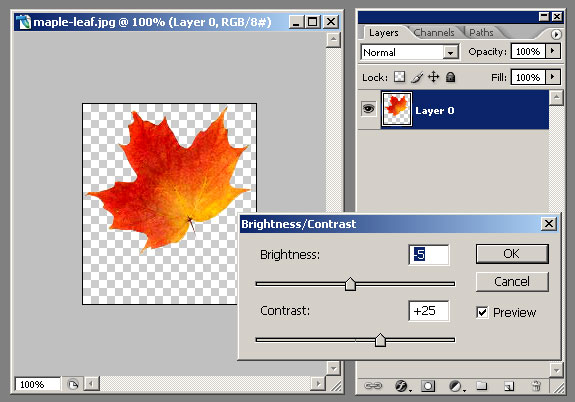 STEP 2
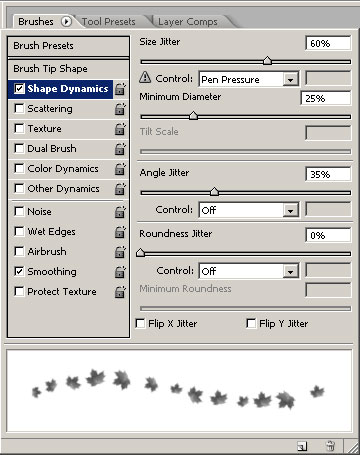
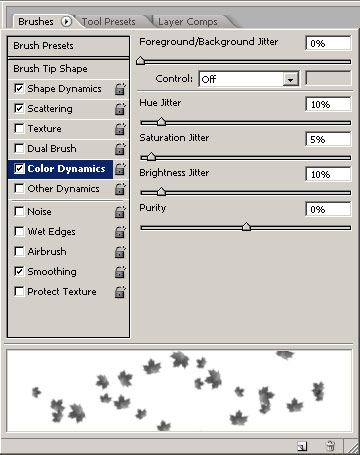
Now with a few brush present we can do that cool flying autumn leaf effect you see below. Open the Brushes Palette and let's start: from the Brush Presets select our leaf brush we just created (it's the last brush on the menu), then from the Brush Tip Shape set the Spacing to 250%-350%, from Shape Dynamics set the Size Jitter to 40%-60%, Minimum Diameter to 25%-35% and Angle Jitter to 35%-65%, leaving the rest of the options default, from the Scattering option set the Scatter to 450%-550% and Count to 2 or 3 and in the end from the Color Dynamics set the Hue Jitter to 10% and the Saturation Jitter to 5%.
For a better understanding, here are some printscreens of what these presets should look like.


Now set your foreground color to #e89d1a and start drawing. You should have something very close to this:
You can play with backgrounds and colors to obtain very nice effects like you see below. Thank you! Hope you enjoyed this new Photoshop tutorial. I will be back with many more, until then check out some of my other photoshop tutorials: